
Clothing into Ornaments
If you have an old shirt with beautiful embroidery, don’t throw it away. Make beautiful ornaments and use the rest as rags for cleaning.
Get a cookie cutter or glass to trace. Try to find one that does not have hard-to-cut corners. This will make it easier to cut and stretch the fabric on.
Take two pieces of thick cardboard and using your cookie cutter or a glass as a template, trace the design onto the cardboard and cut out.
Using the same cookie cutter or glass, trace the same design 1” larger onto the back of the fabric, paying close attention to the design you want to keep. You will also need to make another using the same material for the back of the ornament. Cut out both pieces of fabric.
Place the fabric down on the work surface face down. Place the cardboard over the fabric. Fold over the edges and use a hot glue gun to attach the fabric to the cardboard. If you don’t have a hot glue gun, you can use regular glue and hold into place until set. Continue doing this until all edges are done and both pieces are done.
Now attach a small piece of ribbon or rope to the top of one piece as a hanger. Then using you hot glue or glue, apply a small amount to the entire back of one side. Then press the two pieces back to back and use a book to hold them together. Once dried, you are done. It will look great on your tree, hanging on a hook or in the window.
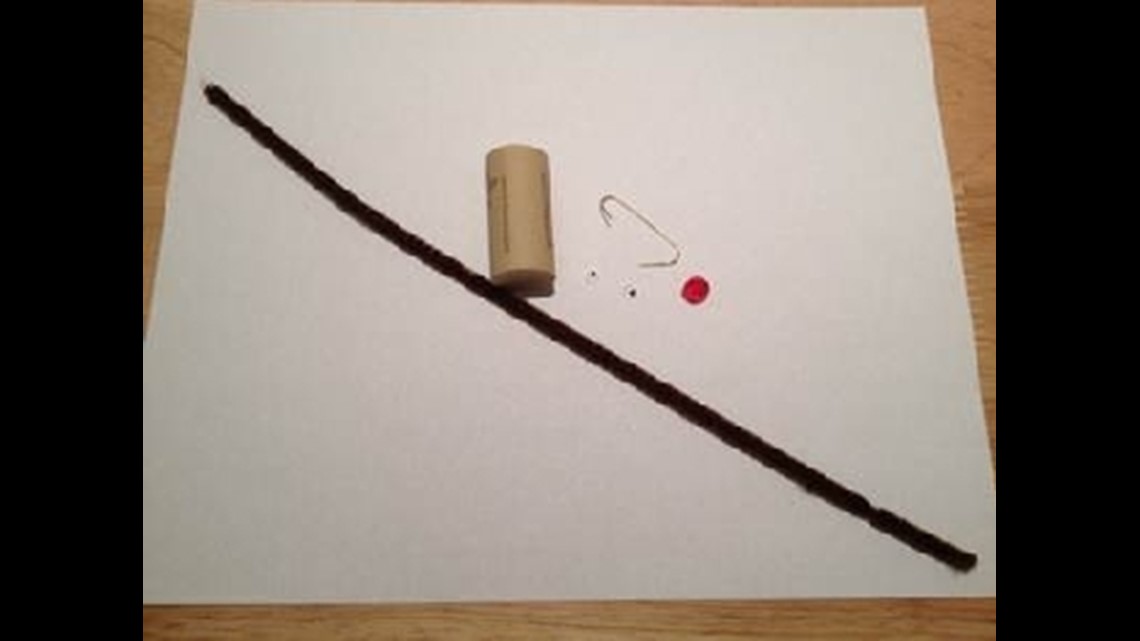
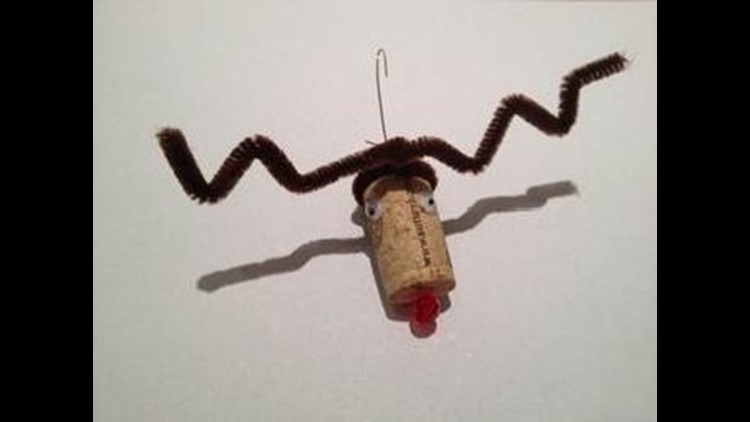
Cork Reindeer/Cork Moose
This is a simple way to make a reindeer or moose using wine corks, red beads, marker, and brown pipe cleaners.
Take the pipe cleaner and wrap it around the end of the cork as shown. Twist to hold in place. Bend the pipe cleaner to create the desired shape (reindeer or moose).
Using a hot glue gun or regular glue attach the red bead to the end of the cork as the nose. For the eyes, you can use “squiggle” eyes or draw them on with a marker. Finally you can attach an ornament hook where you wrapped the pipe cleaners to hang or use a piece of string.
Cup Snowman
Use plastic drinking cups and a desk stapler to make a cup snowman.
Lay the cups end to end and staple each cup together as shown. Continue until you have a ring. Place the next set of cups on top of that layer and staple each one to the one next to it and to the one below each.
As you stack each layer on top of each you will see that each layer continues to make shape we are looking for.
Once you have stapled each layer together, you should see the shape below. Depending upon the size of cup you use, you may need to add a layer to the bottom in order for your snowman to stand correctly.
Once the bottom is complete, start back at the beginning to create the head of your snowman, again, adjusting the layers to create the correct shape.
Once you have the shape you like, you can create the eyes by using black bags, black socks, or black felt.
The nose can be made from orange construction paper rolled into a cone. Use tape or glue to attach.
For the scarf, use any colored ribbon or fabric. You can also give your snowman a hat if you choose.
These crafty creations are from visual designer/artist Keith Renard of Lackawanna County.
For questions: keithrenard@table7.biz